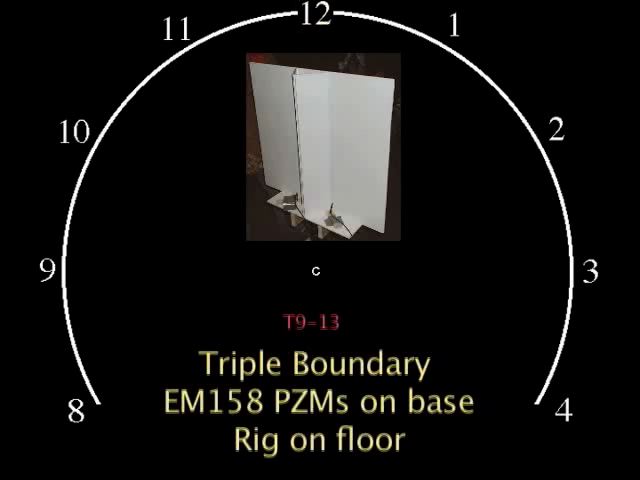
I constructed a mic rig for the Barn Tests which was a boundary capable of variance in width of boundaries (therefore width between capsules), and in the angle of the boundary, it's capable of functioning as a SASS as well as a parallel boundary (blocky) rig. The rig that I constructed was designed to give better separation of the channels and therefore, ideally, a better spatial imaging of the environment. In the tests that we did at the barn many things shown out. Sometimes the acoustic "picture" was nicer than other mics, sometimes not. This had a bit to do with the separation between capsules that I was using. As I widened the spacing I would loose a little in the room image while gaining softness and clarity in the middle strikes. This is what I have chosen to focus on: the warmth that is acheived through my mic design on the 11, 12, and 1 o'clock strikes.
In the first test on my rig the boundary panels were set in a way similar to the standard blocky rig except that rather than being parallel, the front of the panels are turned out from the center 10-12 degrees, this was a constant for all further tests. This is a method Curt Olson found beneficial when attempting to get good separation of channels and a clear audio image, though he was, I believe, recording outdoors. The EM158 capsules were front facing, contrary to what the quicktime graphic says, and inset 2.5 inches, this also on Curt's recommendation as being approximately the best distance for this style of rig, therefore this was also consistent throughout my tests. The sole difference in all of these tests was the separtion of the mic capsules.
TEST #6

test6-4
In test 6-4 I set the EM158 capsules a 7" separation. I decided to pair this test with Rob's Rode NT2000 test. Not only is it the same separation and inset as my mic, it was conducted during the same test. By listening to test6-4 and test6-16 back to back you can hear a slight volume drop in the Rodes. This can be due somewhat to the mics being placed further back in the room, though it was only a few feet. Oddly the gain would seem to be higher in the Rodes seeing as they are unobstructed from the line of sound coming from the center striking areas. The anti-wedge delivers a clear sound, yet keeps from over modulating on the hard 11 o'clock strike right next the wall. The sound remains clear, and though the volume sinks a little as the room opens up at the 1 o'clock, we can still clearly hear frequencies across the spectrum, as well as hearing a nice drawn out decay, allowing us to interpret that the room has opened up in this area. The rode however seems to lose volume and decay on this strike leading us to a poorer image of the room, the anti-wedge even picked up a slight echo from the corner. You can see by the sonograms that the gain is much lower on the Rode test, obviously, but also that the breath of the signal is not as complete as that of the anti-wedge. Given more volume and a more open environment the rode may have performed better, it does seem to have very low noise, but for this test at this volume the anti-wedge gave a clearer sound and better room image.
test6-16

TEST #7

test 7-4
In this comparison we can see one of the great advantages to this type of rig in this environment. I lined up the antiwedge against a 2 boundary PZM rig with the same EM158 capsules and same distance between them, it would have been 3 boundary if it was placed on the floor or the bottom boundary had been larger, but for this comparison we will call it a 2 boundary. It is a excellent sound catcher even without the third boundary and has a much higher gain than the anti-wedge. We can hear in the 11 o'clock strike that the gain spikes and distorts the sound. If used in another setting this accuity could be useful, but it only hurts here. We can still localize the sound from side to side in this test, but the difference between 11 and 1 is hard to measure because of the distortion. The anti-wedge in this test performed rather well, in my opinion slightly better than the test prior. The separation was only increased 2 inches, to 9 inches, for this test, but the richness of the sound improves notably. The imaging is better via increased separation of channels and stronger decay. Again we can look at the sonograms and see how the sound has changed. The gain has slightly dropped between test 6-4 and 7-4, but what has occurred in its place is the register of even more frequencies in the spectrum and even less of a jarring treble. This rounds out the sound and makes it very clean and very distinguishable.
test7-13

~2mb QuickTime movie comparing the two rigs back to back
Test #8

test8-4
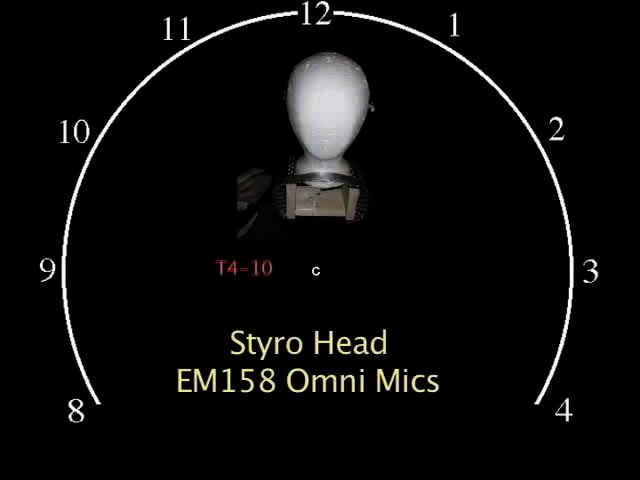
In this comparison I'm not using sound bytes from the same test. I chose to use a test in which the same separation is used, 11 inches, to try to discover the benefits of the boundaries. I am using the a dowel test, front facing like the antiwedge, to compare depth and localization. The lack of boundaries in the 6-8 test seems to give it a far away and airy kind of feel. We don't get the clear image that the anti-wedge gives us. We can tell in the dowel test that the room does open up by comparing the gain between the 11 and 1 o'clock strikes, but without the separation of boundaries or a baffel the distiction is muddied and we can't place the sound precisely. The antiwedge does allow us an better image of the room than the dowel, but unfortunately the gain has decreased from the previous test and the warmth of the sound is not quite as rich.
test6-8

~2mb QuickTime movie comparing the two rigs back to back
TEST #9

test9-4
This comparison is again between two samples from the same test, the anti-wedge with a 17 inch separation and a dowel rig with an 18 inch separation of capsules set at ORTF. This is a somewhat drastic jump from the previous width, and it can be heard. The gain again drops dramatically in the antiwedge, but it still maintains its clear separation and "soft middle". The gain however is still higher than the ORTF rig, which doesn't have anything obstructing it from the sound. This may be one of the most telling features of the anti-wedge, its ability to pick up sound while automatically separating channels and tapering the overly harsh spikes. This separation seems to be a little excessive for this kind of testing, the 11 or 13 inch were very clear and discernable. But it could be useful for increased separation of channels in the outdoors or a crowd/event setting.
test9-8

All in all the antiwedge performed very well in all its tests that I put it through. For the amount of money put into it, not to mention the capsules, it seems to be a strong performing affordable mic rig that can be contoured to fit many circumstances.